Showing posts with label scrapbooking. Show all posts

February 27, 2012

Craft-N-Doodle is here!


The Craft-N-Doodle scrapbooking storage center is here to serve you through all of your upcoming creative projects! Self contained, portable, and able to seperate into two individual storage containers.


What does the Craft-N-Doodle offer you?
  • Portability
  • Organization
  • Creativity
  • FUN!

The Craft-N-Doodle regularly sells for $399 but you can order it on sale now from beverlys.com for just $125!!! This is a great product at an unbeatable sale price so pick one up while you can!


Visit beverlys.com for detailed information and to place your order today!

December 11, 2011

Goosebumps in December!

Goosebumps Texture Spray
I am not a fan of scary movies. They give me goosebumps, and not in a good way. But last week, I got a different kind of Goosebumps...from Tsukineko! And believe me, I loved them!

Goosebumps is a new texture spray that can be used on multiple surfaces; paper, canvas, glass, acetate, they all take on a new dimension with this fabulous new product! Goosebumps comes in three different formulas--matte, gloss and shimmer--for tons of crafting possibilities.

Goosebumps Texture Spray on Printed Cardstock
Sprayed on a sheet of plain or printed cardstock, Goosebumps instantly gives the paper texture, dimension, and a bit of shine.

Goosebumps Texture Spray with Mask
Used with a mask, you can create your own patterns on cardstock. Think about how fun it would be to create your own background paper. And masks don't have to be specialized...you could use different household objects like rubber bands, coins, nuts and bolts. Goosebumps will wash off if you remove the masks befor allowing it to dry.

Goosebumps Birthday Card
For this card, I used blue painter's tape right on the front of the card. I sprayed on gloss Goosebumps and allowed it to dry. After removing the tape, I inked over the entire card for a tone-on-tone jacquard stripe effect.

Goosebumps Book Page
Here, I sprayed Goosebumps directly on a rubber stamp, and stamped on a book page. When the Goosebumps dried, I dragged some distress ink over the page to define the edges.

Here's my result on a mirror using matte Goosebumps and a stencil. Instant frosted glass! (It's hard to take a picture of a mirror...please excuse the quality and trust me that this looks so much prettier in person!)

Delicata Ink
Combine Goosebumps with Tsukineko's new Delicata metallic ink and the results are stunning! Delicata is a metallic that won't tarnish or lose it's luster like some other inks, making it a great option for keepsake projects. It's also a great alternative to gold leafing for more delicate surfaces.

Delicata Crown Card
These products will be arriving in your local Beverly's around December 18, 2011.  So, ask Santa to tuck some Goosebumps and Delicata in your stocking this Chrismas. You'll be glad you did!


tag: allstores

November 11, 2011

Beverly's Supports Our Troops this Holiday

Operation Christmas Card Giant Card
Today is Veteran's Day, and we'd first like to thank all the American veterans who have served our country so bravely in the past!

What better day than today to update you all on the results of Operation Christmas Card in our Beverly's stores? Last Saturday, customers took time out of their shopping visits to make cards for the military men and women currently serving in the Armed Forces. Customers of all ages, men, women, and children, came together, and with supplies provided by Beverly's, created over 1,300 cards for our troops!

Operation Christmas Cards
The cards included heartfelt messages for the troops safety, thanks for their service and wishes for a happy holiday season so far from home.

This morning we counted the cards and boxed them up for delivery to the headquarters of Operation Christmas Card. From there, the members of that organization will insure that the cards will reach our troops in time for the holiday.

Beverly's would like to thank EK Success for giving us the opportunity to take part in this worthwhile service project, the customers who put their talents to good use creating the cards, and all the service men and women who serve our country so bravely.

tag: allstores

November 3, 2011

Operation Christmas Card at Beverly's!

Operation Christmas Card LogoIn conjuction with EK Success Brands, Beverly's Fabrics & Crafts stores are participating in Operation Christmas Cards, a campaign sending holiday cards to US and Canadian military men and women who are serving overseas. The goal for 
Operation Christmas Cards this year is to send 175,000 cards to bases around the world. For some, these cards will be the only holiday correspondence they receive.

Christmas Cards for TroopsEK Success Brands has set a goal to collect 9,000 cards before November 11th. Your local Beverly's Fabrics & Crafts stores will be acting as drop off locations for this effort. Additionally, you can stop by your local Beverly's Fabric & Crafts store on Saturday, November 5th, 2011, 1pm to closing to make a free card to send to the troops!


If you are making your own cards at home, here are a few simple guidelines:
• Please DO NOT seal the envelopes, or apply postage
• Feel free to write supportive and encouraging notes
• You may include your email or mailing address inside the card
• Please do not use products that contain exposed glitter
• Non-crafted, store-bought cards may be sent as well

Dog TagsIf you are not able to drop your cards off at one of our stores, you can still participate! Cards may be sent directly to Operation Christmas Cards.

Make a difference to someone this Christmas with a gift of your thoughtfulness and support. It’s what we crafters do best!

tag: allstores

September 1, 2011

Simply Smashing!

There's a new way to journal in the 21st century and it's called Smash!

Developed by K&Company, this hip new line of journals and accessories is selling out of our stores faster that we can stock the shelves.

Smash Book in Stores PhotoThe books themselves, or folios as Smash calls them, come in seven different themes. One for every personality...or every day of the week! Each one has 40 pages, with a different background image on every page. A blank white page can sometimes be intimidating...this little book fixes that! Right now you can choose from International Yellow, Simple Orange, Eco Green, Mod Black, Doodle Red, Pretty Pink or Retro Blue. I'm hoping they come out with one that could be used for a Christmas journal (hint, hint!).

And so many great accessories! Pockets, tabs, flags, clips, tape, journaling pads...the makers of Smash have thought of everything! Combine these with the snippets of your daily life, like receipts, lists, photos or love notes, and your Smash book can truly become a reflection of you.

Smash StickOne of the coolest features of this book is the Smash Stick. It has a pen on one end, a glue stick on the other, and it fits right in the loop attached to the book. This awesome tool makes it easy to stick your stuff in on the go and eliminates bringing along bulky accessories.

There's no right or wrong way to use Smash. Use it to record important things. Or use it to record the little things that happen every day. Here's what the makers of Smash have to say:

Smash Quote

So, what are you waiting for? Grab a folio and start Smashing!

**Thanks to K&Company for use of the Smash video and quote.

August 25, 2011

Accordion Envelope Book

Envelope Accordion Album PhotoThis week, Beverly's stores hosted an evening of Social Crafting, featuring this cute accordion envelope book. The participants had so much fun creating this project that we decided to share it with you here!

Created with basic envelopes, the book is then embellished with scrapbook paper (we used Funhouse from GCD), ribbons, flowers and bling.
Imagine the embellishment possibilites! With Christmas paper, it becomes a place to store your lists, budget and receipts. Covered with a cute kitchen print, it will hold your shopping list and coupons for the grocery store!
Read on for step by step instructions, or download the project here.


Supplies Needed:

5 Envelopes (we used 5 ¼” x 7 ¼”, but other sizes work)
4 5”x7” Greeting Cards (paper measures 10”x7”)
3 Sheets Double Sided, Patterned Scrapbook Paper
(or 6 Sheets Single Sided Patterned Paper)
6 Sheets Solid Cardstock to Coordinate with Patterned Paper
Ribbon
Envelope Accordion Book PhotoRibbon-Slot Edge Punch
Decorative Edge Punch
Rat Tail Cord
Paper Clips
Small Silk Flowers
TinyType Alphabet Stickers
Rhinestones, Buttons for Embellishment
Distress Ink
Adhesive of Choice
Craft Knife, Scissors
 
To Make the Base Book:

Accordion Album Step 1 PhotoCreate accordion book from five envelopes. Using a glue stick, adhere the envelopes together by placing adhesive on the inside of the flap of one envelope attaching it to the front of the next envelope. Repeat for all five envelopes.


Accordion Album Step 1a Photo

Fold the pages accordion style, making the flap of the first envelope the cover of your book.


Accordion Album Step 2 Photo


Add a ribbon closure. Cut a small opening the width of the ribbon on both sides of the last envelope and run the ribbon through (page shown already decorated).


To Make the Cover:

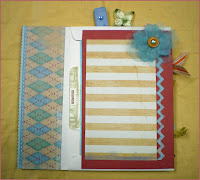
Cut two pieces of decorative scrapbook paper measuring 2”x7 ¼”. Adhere to front and back of first envelope flap, using the adhesive of your choice.
Accordion Album Step 3 Photo
Page 1:
Adhere 4 ½” x 7” piece of solid cardstock to envelope pouch, as pictured.
Top with edge punched 4”x6” piece of patterned paper.
Embellish with silk flower, button and rhinestone.
Pocket insert will be created later in this tutorial.

Page 2:

Accordion Album Step 5 Photo
Adhere 4 ½” x 7” piece of decorative paper to envelope pouch, as pictured. 
Top with 4”x6” piece of solid cardstock. Use pieces of coordinating paper to embellish.
Use Tiny Type stickers to spell out “LOOK HERE” on inside of pouch edge.
Pocket insert will be created later in this tutorial.


Accordion Album Step 6 Photo


Page 3:
Edge punch 4 ½” x 7” piece of solid cardstock with ribbon slot punch.
Weave  ribbon through slots as pictured, skipping one slot on the top as you weave. Tape ends on back of paper. 
Adhere to envelope pouch, as pictured. 
Top with 4”x6” piece of patterned paper.
Pocket insert will be created later in this tutorial.

 
Page 4:

Accordion Album Step 8 Photo
Edge punch 4 ½” x 7” piece of solid cardstock with ribbon slot punch. 
Tie two 4” pieces of in a knot. Weave  the ends from the center through slots as pictured, skipping three slots each time you weave. Tape ends on back of paper. 
Adhere to envelope pouch, as pictured.
Top with two piece of patterned paper, measuring 2 ½” square and 2 ¾”x 3 ½”, respectively.
Embellish with decorative paper and rhinestones.
Pocket insert will be created later in this tutorial.

 Page 5:
Accordion Album Step 9 Photo
Adhere 4 ½” x 7” piece of decorative paper to envelope pouch, as pictured.  
Top with 4”x6” piece of solid cardstock. Use pieces of coordinating paper to embellish.

Use rhinestones and buttons to embellish as desired. 
Pocket insert will be created later in this tutorial.


Back Cover:

Accordion Album Step 10 Photo
Adhere a 5 ¼”x7 ¼” piece of decorative cardstock to front side of last envelope, as pictured (this is the opposite side of the book than you have been working on.


Decorative Paper Clips:
Accordion Album Paperclips
Use a strong adhesive to adhere scraps of paper or silk flowers to the tops of paper clips. Embellish as desired.


Accordion Album Step 11 Photo
File Folder Insert:
Make tab on one 7” side by cutting ½”x2” notches on both sides. Use corner rounder to round tab.
Distress tab with distress ink.
Adhere Tiny Type letters to spell “MEMORIES.”


Accordion Album Step 12b Photo
Make folder from back of card by folding back of card to inside in at 2 ½” inches. 
Cover card under tab with patterned cardstock, 4”x7”. Add strip of solid cardstock under tab.
Cut three pieces of patterned cardstock, 1 ½” x 7”, 2”x7”, 2 1/2” x 7” and adhere to flaps of folder as shown.


Accorion Album Step 13a Photo
Mini Book Insert:
Cut 4”x7” piece of double sided cardstock. Fold in half.
Cut greeting card into two pieces measuring 3 ½”x6”. Fold in half. Align in center of folded double sided cardstock. 
Punch two holes along fold lines through all layers. Run rat tail through and tie in a bow on the outside.
Embellish cover as desired. 


Accordion Album Step 14 Photo
Gatefold Insert:
Cut greeting card down to 5” height.
Open card. Fold front to center and back to center to create gate fold. 
Cut two 2 ½”x3” pieces of decorative paper. Adhere to front flaps.
Use Tiny Type stickers to spell out “SWEET SMILES” on front flaps.
Use paper scrap embellishment to make gatefold “latch.”


Accordion Album Step 14b Photo
Adhere 4 ½” square of decorative paper to inside of card. 


Accordion Album Step 15 Photo
Tag Inserts:
Cut two pieces of solid cardstock, 2 ½” x 4 ½”. Cut corners from one end to form tag shape. 
Distress with distressing ink.
Embellish with ½” strips of decorative paper. 
Punch hole at notched end and embellish with ribbon.


Accordion Album Step 16a Photo
Pocket Card Insert:
Cut the front of greeting card to 3”. Embellish with two 2 ½” squares of decorative paper, and a strip of decorativepaper in the middle.
Create pocket on inside of card. 
Cut decorative paper to 3”x5”. Apply adhesive to two short sides and bottom long side and adhere to inside of card to make pocket.
Cut a piece of decorative paper 3 ½” x 6”. Notch corners on one short side to make tag shape. Punch hole and embellish with ribbon.


Place all inserts in pouches and attach clips at top. Accordion fold shut and tie closed with ribbon. Enjoy!

January 19, 2011

New Imaginisce Paper Collections Arrive!
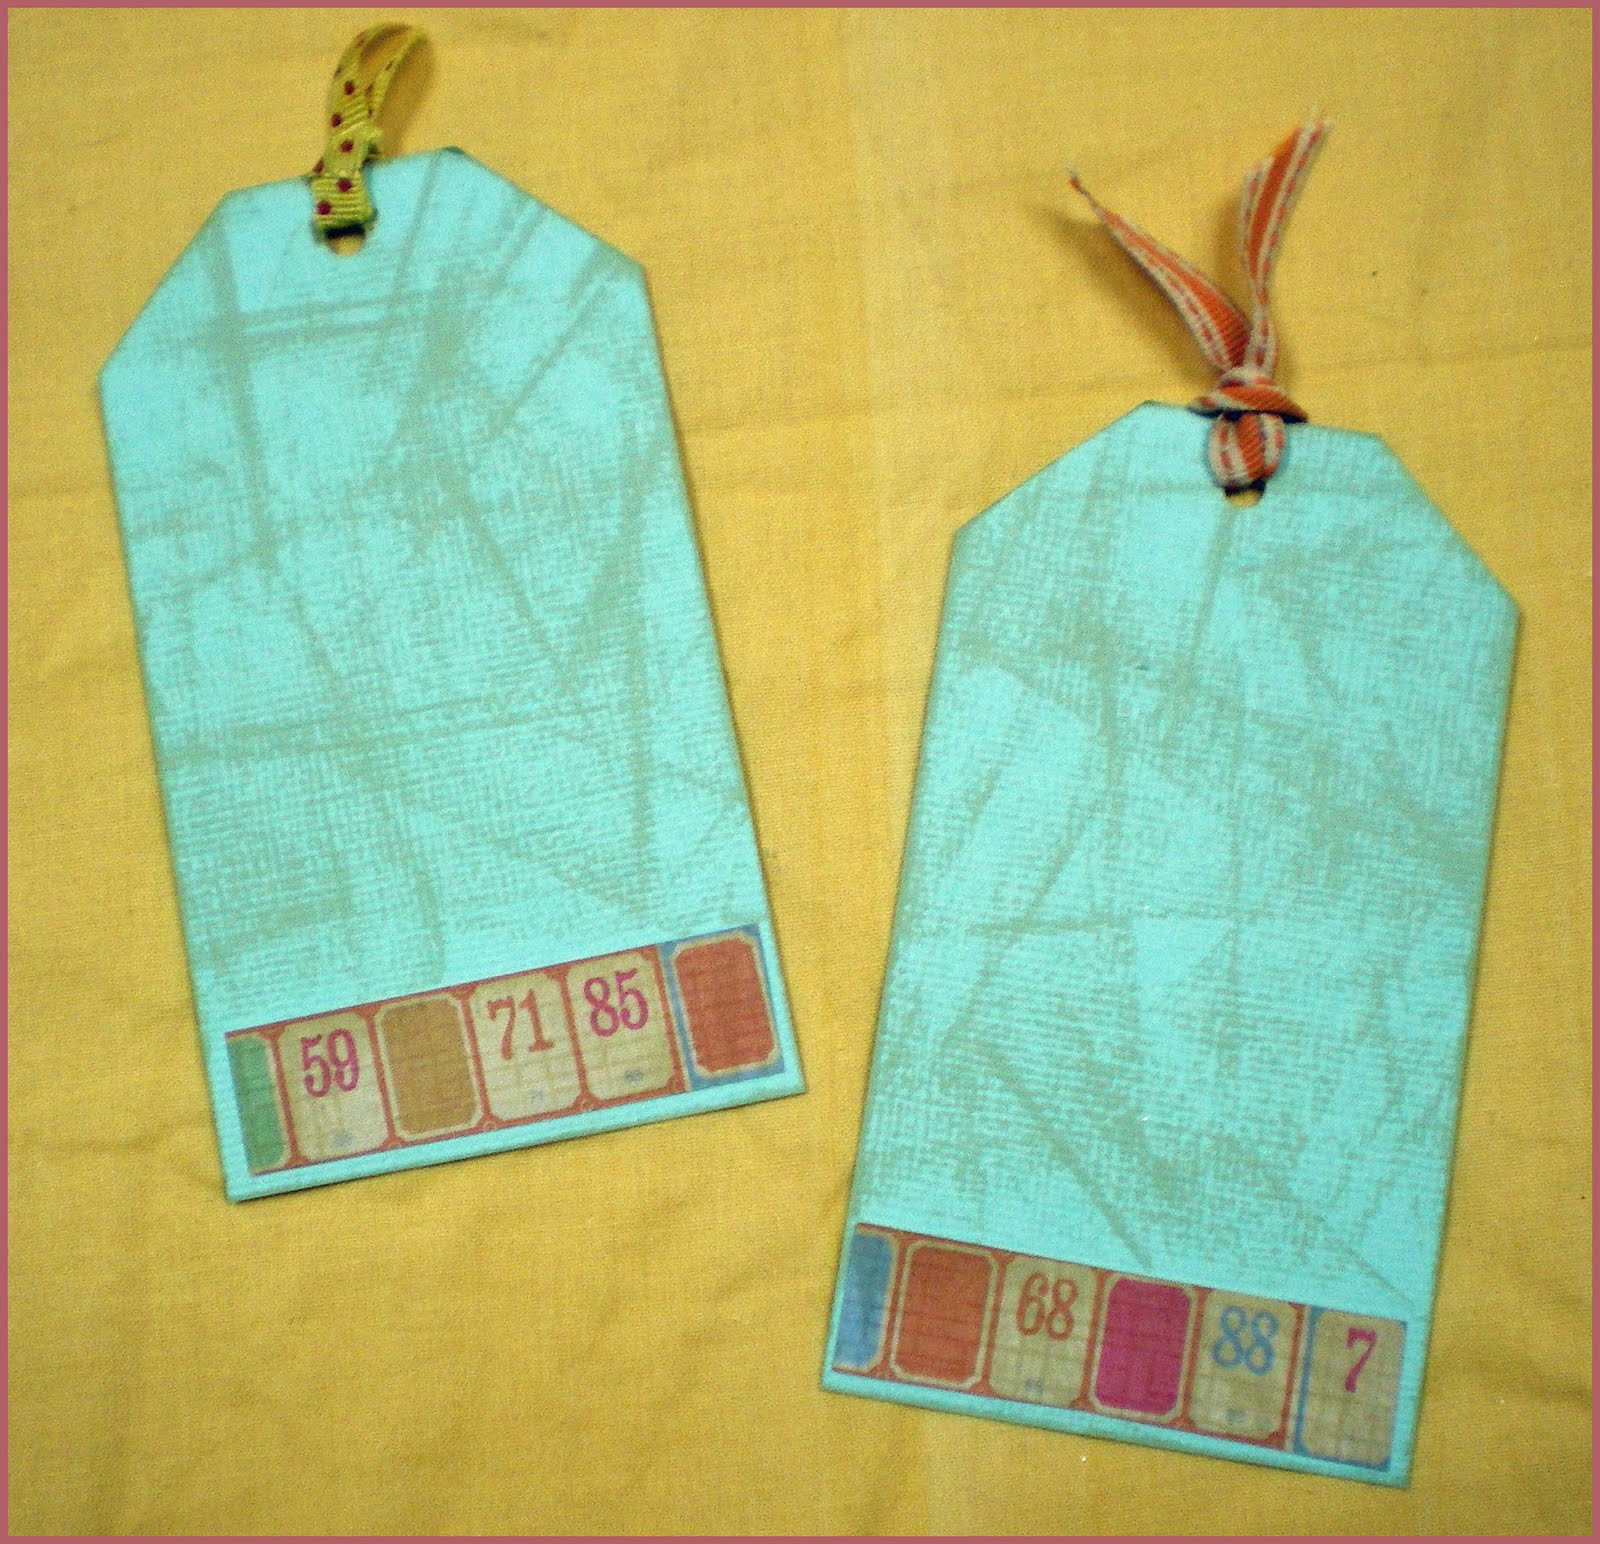
A few of the new Imaginisce papers we now carry

Three exciting new paper collections from Imaginisce are now available at your local Beverly's! The Dinosaur, Princess & Birthday paper collections are so unique and fun and add a great touch to any art project, papercrafting project or scrapbooking album.
tag: allstores