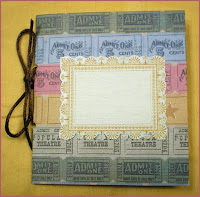
 This week, Beverly's stores hosted an evening of Social Crafting, featuring this cute accordion envelope book. The participants had so much fun creating this project that we decided to share it with you here!
Created with basic envelopes, the book is then embellished with scrapbook paper (we used Funhouse from GCD), ribbons, flowers and bling.
Imagine the embellishment possibilites! With Christmas paper, it becomes a place to store your lists, budget and receipts. Covered with a cute kitchen print, it will hold your shopping list and coupons for the grocery store!
Read on for step by step instructions, or download the project here.
Supplies Needed:
5 Envelopes (we used 5 ¼” x 7 ¼”, but other sizes work)
4 5”x7” Greeting Cards (paper measures 10”x7”)
3 Sheets Double Sided, Patterned Scrapbook Paper
(or 6 Sheets Single Sided Patterned Paper)
6 Sheets Solid Cardstock to Coordinate with Patterned PaperDecorative Edge Punch
Rat Tail Cord
Paper Clips
Small Silk Flowers
TinyType Alphabet Stickers
Rhinestones, Buttons for Embellishment
Distress Ink
Adhesive of Choice
Craft Knife, Scissors
To Make the Base Book:
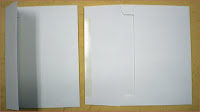 Create accordion book from five envelopes. Using a glue stick, adhere the envelopes together by placing adhesive on the inside of the flap of one envelope attaching it to the front of the next envelope. Repeat for all five envelopes.
Add a ribbon closure. Cut a small opening the width of the ribbon on both sides of the last envelope and run the ribbon through (page shown already decorated).
To Make the Cover:
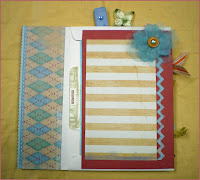
Top with 4”x6” piece of solid cardstock. Use pieces of coordinating paper to embellish.
Back Cover:
Decorative Paper Clips:
Place all inserts in pouches and attach clips at top. Accordion fold shut and tie closed with ribbon. Enjoy!
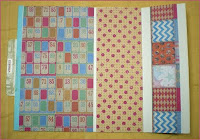
Cut two pieces of decorative scrapbook paper measuring 2”x7 ¼”. Adhere to front and back of first envelope flap, using the adhesive of your choice.

Page 1:
Adhere 4 ½” x 7” piece of solid cardstock to envelope pouch, as pictured.
Top with edge punched 4”x6” piece of patterned paper.
Embellish with silk flower, button and rhinestone.
Pocket insert will be created later in this tutorial.
Top with 4”x6” piece of solid cardstock. Use pieces of coordinating paper to embellish.
Use Tiny Type stickers to spell out “LOOK HERE” on inside of pouch edge.
Pocket insert will be created later in this tutorial.
Edge punch 4 ½” x 7” piece of solid cardstock with ribbon slot punch.
Weave ribbon through slots as pictured, skipping one slot on the top as you weave. Tape ends on back of paper.
Adhere to envelope pouch, as pictured.
Top with 4”x6” piece of patterned paper.
Pocket insert will be created later in this tutorial.
Page 4:
Edge punch 4 ½” x 7” piece of solid cardstock with ribbon slot punch.
Tie two 4” pieces of in a knot. Weave the ends from the center through slots as pictured, skipping three slots each time you weave. Tape ends on back of paper.
Adhere to envelope pouch, as pictured.
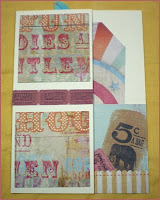
Top with two piece of patterned paper, measuring 2 ½” square and 2 ¾”x 3 ½”, respectively.Embellish with decorative paper and rhinestones.
Pocket insert will be created later in this tutorial.
Pocket insert will be created later in this tutorial.
Page 5:
Top with 4”x6” piece of solid cardstock. Use pieces of coordinating paper to embellish.
Use rhinestones and buttons to embellish as desired.
Pocket insert will be created later in this tutorial.
Back Cover:
Adhere a 5 ¼”x7 ¼” piece of decorative cardstock to front side of last envelope, as pictured (this is the opposite side of the book than you have been working on.
Decorative Paper Clips:
Use a strong adhesive to adhere scraps of paper or silk flowers to the tops of paper clips. Embellish as desired.
Make tab on one 7” side by cutting ½”x2” notches on both sides. Use corner rounder to round tab.
Distress tab with distress ink.
Adhere Tiny Type letters to spell “MEMORIES.”
Cover card under tab with patterned cardstock, 4”x7”. Add strip of solid cardstock under tab.
Cut three pieces of patterned cardstock, 1 ½” x 7”, 2”x7”, 2 1/2” x 7” and adhere to flaps of folder as shown.
Cut three pieces of patterned cardstock, 1 ½” x 7”, 2”x7”, 2 1/2” x 7” and adhere to flaps of folder as shown.
Cut 4”x7” piece of double sided cardstock. Fold in half.
Cut greeting card into two pieces measuring 3 ½”x6”. Fold in half. Align in center of folded double sided cardstock.
Punch two holes along fold lines through all layers. Run rat tail through and tie in a bow on the outside.
Embellish cover as desired.
Cut greeting card down to 5” height.
Open card. Fold front to center and back to center to create gate fold.
Cut two 2 ½”x3” pieces of decorative paper. Adhere to front flaps.
Use Tiny Type stickers to spell out “SWEET SMILES” on front flaps.
Use paper scrap embellishment to make gatefold “latch.”
Use paper scrap embellishment to make gatefold “latch.”
Cut two pieces of solid cardstock, 2 ½” x 4 ½”. Cut corners from one end to form tag shape.
Distress with distressing ink.
Embellish with ½” strips of decorative paper.
Punch hole at notched end and embellish with ribbon.
Cut the front of greeting card to 3”. Embellish with two 2 ½” squares of decorative paper, and a strip of decorativepaper in the middle.
Create pocket on inside of card.
Cut decorative paper to 3”x5”. Apply adhesive to two short sides and bottom long side and adhere to inside of card to make pocket.
Cut a piece of decorative paper 3 ½” x 6”. Notch corners on one short side to make tag shape. Punch hole and embellish with ribbon.
Place all inserts in pouches and attach clips at top. Accordion fold shut and tie closed with ribbon. Enjoy!


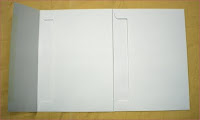




No comments:
Post a Comment