September 16, 2011

Polymer Steampunk Bird

One of the rages sweeping the crafting world right now is Steampunk. What is steampunk, you ask? Think of it as Victorian science fiction, futuristic workings in the past, goggles, gears, clockworks!

Polymer Steampunk Lizard!
Polymer Steampunk Heart!Renowned polymer artist Christi Friesen has truly embraced the steampunk style, and has even published a book about it, Steampunkery! Christi combines polymer clay, beads, gears and small found objects to create animals, hearts and other interesting treasures.

Now, I hadn’t ever dabbled in the world of polymer clay before today. I scrapbook, knit, quilt and sew, but clay has always been a mystery to me. That is, until I watched Christi’s new video tutorial on making a polymer steampunk bird.

Her friendly style and amusing explanations had me smiling from the start. She made rolling a ball of clay look so easy and fun (and her cake analogy made me hungry)! I had to try it! So, with a block of Sculpey, some beads, and bits and pieces of old watches, here’s what I came up with.

Polymer Steampunk Bird!
Not bad for a rookie, huh? I have to say, following Christi’s step by step instructions made this little project both easy and fun. And a pasta machine to help soften the clay didn’t hurt either.

Polymer Steampunk Elephant


Next up, I’m going to brave another creation from her book...maybe this elephant? I think I’m hooked on the steampunk craze too!

tag: allstores

September 9, 2011

Stonehenge Revisited

Stonehenge Table Runner Photo
Have you ever wanted to capture the magic of Stonehenge in a quilt? Well, now you can, thanks to the new line of Stonehenge fabric by Sunshine Cottage from Northcott, available here!

This collection of 100% cotton fabric, designed by Linda Ludovico, has the look of stone but the feel of silk. It to comes in a wonderful array of colors, with pallettes including Warm Stone, Cool Stone, Mother Earth and Mohave.


Stonehenge Table Runner
Donatella Simmonds, quilting expert in our Monterey store, created the beautiful table runner you see here using the Stonehenge Warm Stone pallette. The results are amazing, wouldn't you agree? I asked her how she liked working with the fabric.

"It was so nice to work with," Donatella told me. "It has a beautiful sheen and the high thread count made it a dream to sew. All the colors worked together so well."


Stonehenge Fabric Package


Beverly's is proud to carry this amazing line of fabrics online and in the following stores: Bakersfield, Carmichael Yards of Fabric, Citrus Heights, Rocklin, San Diego, San Jose, Santa Rosa, Soquel and Stockton. A variety of colors is available as yardage, with strip packs becoming available later in the fall.

What magic will you create with Stonehenge?


tag: allstores

September 1, 2011

Simply Smashing!

There's a new way to journal in the 21st century and it's called Smash!

Developed by K&Company, this hip new line of journals and accessories is selling out of our stores faster that we can stock the shelves.

Smash Book in Stores PhotoThe books themselves, or folios as Smash calls them, come in seven different themes. One for every personality...or every day of the week! Each one has 40 pages, with a different background image on every page. A blank white page can sometimes be intimidating...this little book fixes that! Right now you can choose from International Yellow, Simple Orange, Eco Green, Mod Black, Doodle Red, Pretty Pink or Retro Blue. I'm hoping they come out with one that could be used for a Christmas journal (hint, hint!).

And so many great accessories! Pockets, tabs, flags, clips, tape, journaling pads...the makers of Smash have thought of everything! Combine these with the snippets of your daily life, like receipts, lists, photos or love notes, and your Smash book can truly become a reflection of you.

Smash StickOne of the coolest features of this book is the Smash Stick. It has a pen on one end, a glue stick on the other, and it fits right in the loop attached to the book. This awesome tool makes it easy to stick your stuff in on the go and eliminates bringing along bulky accessories.

There's no right or wrong way to use Smash. Use it to record important things. Or use it to record the little things that happen every day. Here's what the makers of Smash have to say:

Smash Quote

So, what are you waiting for? Grab a folio and start Smashing!

**Thanks to K&Company for use of the Smash video and quote.

August 25, 2011

Accordion Envelope Book

Envelope Accordion Album PhotoThis week, Beverly's stores hosted an evening of Social Crafting, featuring this cute accordion envelope book. The participants had so much fun creating this project that we decided to share it with you here!

Created with basic envelopes, the book is then embellished with scrapbook paper (we used Funhouse from GCD), ribbons, flowers and bling.
Imagine the embellishment possibilites! With Christmas paper, it becomes a place to store your lists, budget and receipts. Covered with a cute kitchen print, it will hold your shopping list and coupons for the grocery store!
Read on for step by step instructions, or download the project here.


Supplies Needed:

5 Envelopes (we used 5 ¼” x 7 ¼”, but other sizes work)
4 5”x7” Greeting Cards (paper measures 10”x7”)
3 Sheets Double Sided, Patterned Scrapbook Paper
(or 6 Sheets Single Sided Patterned Paper)
6 Sheets Solid Cardstock to Coordinate with Patterned Paper
Ribbon
Envelope Accordion Book PhotoRibbon-Slot Edge Punch
Decorative Edge Punch
Rat Tail Cord
Paper Clips
Small Silk Flowers
TinyType Alphabet Stickers
Rhinestones, Buttons for Embellishment
Distress Ink
Adhesive of Choice
Craft Knife, Scissors
 
To Make the Base Book:

Accordion Album Step 1 PhotoCreate accordion book from five envelopes. Using a glue stick, adhere the envelopes together by placing adhesive on the inside of the flap of one envelope attaching it to the front of the next envelope. Repeat for all five envelopes.


Accordion Album Step 1a Photo

Fold the pages accordion style, making the flap of the first envelope the cover of your book.


Accordion Album Step 2 Photo


Add a ribbon closure. Cut a small opening the width of the ribbon on both sides of the last envelope and run the ribbon through (page shown already decorated).


To Make the Cover:

Cut two pieces of decorative scrapbook paper measuring 2”x7 ¼”. Adhere to front and back of first envelope flap, using the adhesive of your choice.
Accordion Album Step 3 Photo
Page 1:
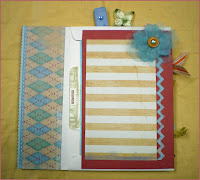
Adhere 4 ½” x 7” piece of solid cardstock to envelope pouch, as pictured.
Top with edge punched 4”x6” piece of patterned paper.
Embellish with silk flower, button and rhinestone.
Pocket insert will be created later in this tutorial.

Page 2:

Accordion Album Step 5 Photo
Adhere 4 ½” x 7” piece of decorative paper to envelope pouch, as pictured. 
Top with 4”x6” piece of solid cardstock. Use pieces of coordinating paper to embellish.
Use Tiny Type stickers to spell out “LOOK HERE” on inside of pouch edge.
Pocket insert will be created later in this tutorial.


Accordion Album Step 6 Photo


Page 3:
Edge punch 4 ½” x 7” piece of solid cardstock with ribbon slot punch.
Weave  ribbon through slots as pictured, skipping one slot on the top as you weave. Tape ends on back of paper. 
Adhere to envelope pouch, as pictured. 
Top with 4”x6” piece of patterned paper.
Pocket insert will be created later in this tutorial.

 
Page 4:

Accordion Album Step 8 Photo
Edge punch 4 ½” x 7” piece of solid cardstock with ribbon slot punch. 
Tie two 4” pieces of in a knot. Weave  the ends from the center through slots as pictured, skipping three slots each time you weave. Tape ends on back of paper. 
Adhere to envelope pouch, as pictured.
Top with two piece of patterned paper, measuring 2 ½” square and 2 ¾”x 3 ½”, respectively.
Embellish with decorative paper and rhinestones.
Pocket insert will be created later in this tutorial.

 Page 5:
Accordion Album Step 9 Photo
Adhere 4 ½” x 7” piece of decorative paper to envelope pouch, as pictured.  
Top with 4”x6” piece of solid cardstock. Use pieces of coordinating paper to embellish.

Use rhinestones and buttons to embellish as desired. 
Pocket insert will be created later in this tutorial.


Back Cover:

Accordion Album Step 10 Photo
Adhere a 5 ¼”x7 ¼” piece of decorative cardstock to front side of last envelope, as pictured (this is the opposite side of the book than you have been working on.


Decorative Paper Clips:
Accordion Album Paperclips
Use a strong adhesive to adhere scraps of paper or silk flowers to the tops of paper clips. Embellish as desired.


Accordion Album Step 11 Photo
File Folder Insert:
Make tab on one 7” side by cutting ½”x2” notches on both sides. Use corner rounder to round tab.
Distress tab with distress ink.
Adhere Tiny Type letters to spell “MEMORIES.”


Accordion Album Step 12b Photo
Make folder from back of card by folding back of card to inside in at 2 ½” inches. 
Cover card under tab with patterned cardstock, 4”x7”. Add strip of solid cardstock under tab.
Cut three pieces of patterned cardstock, 1 ½” x 7”, 2”x7”, 2 1/2” x 7” and adhere to flaps of folder as shown.


Accorion Album Step 13a Photo
Mini Book Insert:
Cut 4”x7” piece of double sided cardstock. Fold in half.
Cut greeting card into two pieces measuring 3 ½”x6”. Fold in half. Align in center of folded double sided cardstock. 
Punch two holes along fold lines through all layers. Run rat tail through and tie in a bow on the outside.
Embellish cover as desired. 


Accordion Album Step 14 Photo
Gatefold Insert:
Cut greeting card down to 5” height.
Open card. Fold front to center and back to center to create gate fold. 
Cut two 2 ½”x3” pieces of decorative paper. Adhere to front flaps.
Use Tiny Type stickers to spell out “SWEET SMILES” on front flaps.
Use paper scrap embellishment to make gatefold “latch.”


Accordion Album Step 14b Photo
Adhere 4 ½” square of decorative paper to inside of card. 


Accordion Album Step 15 Photo
Tag Inserts:
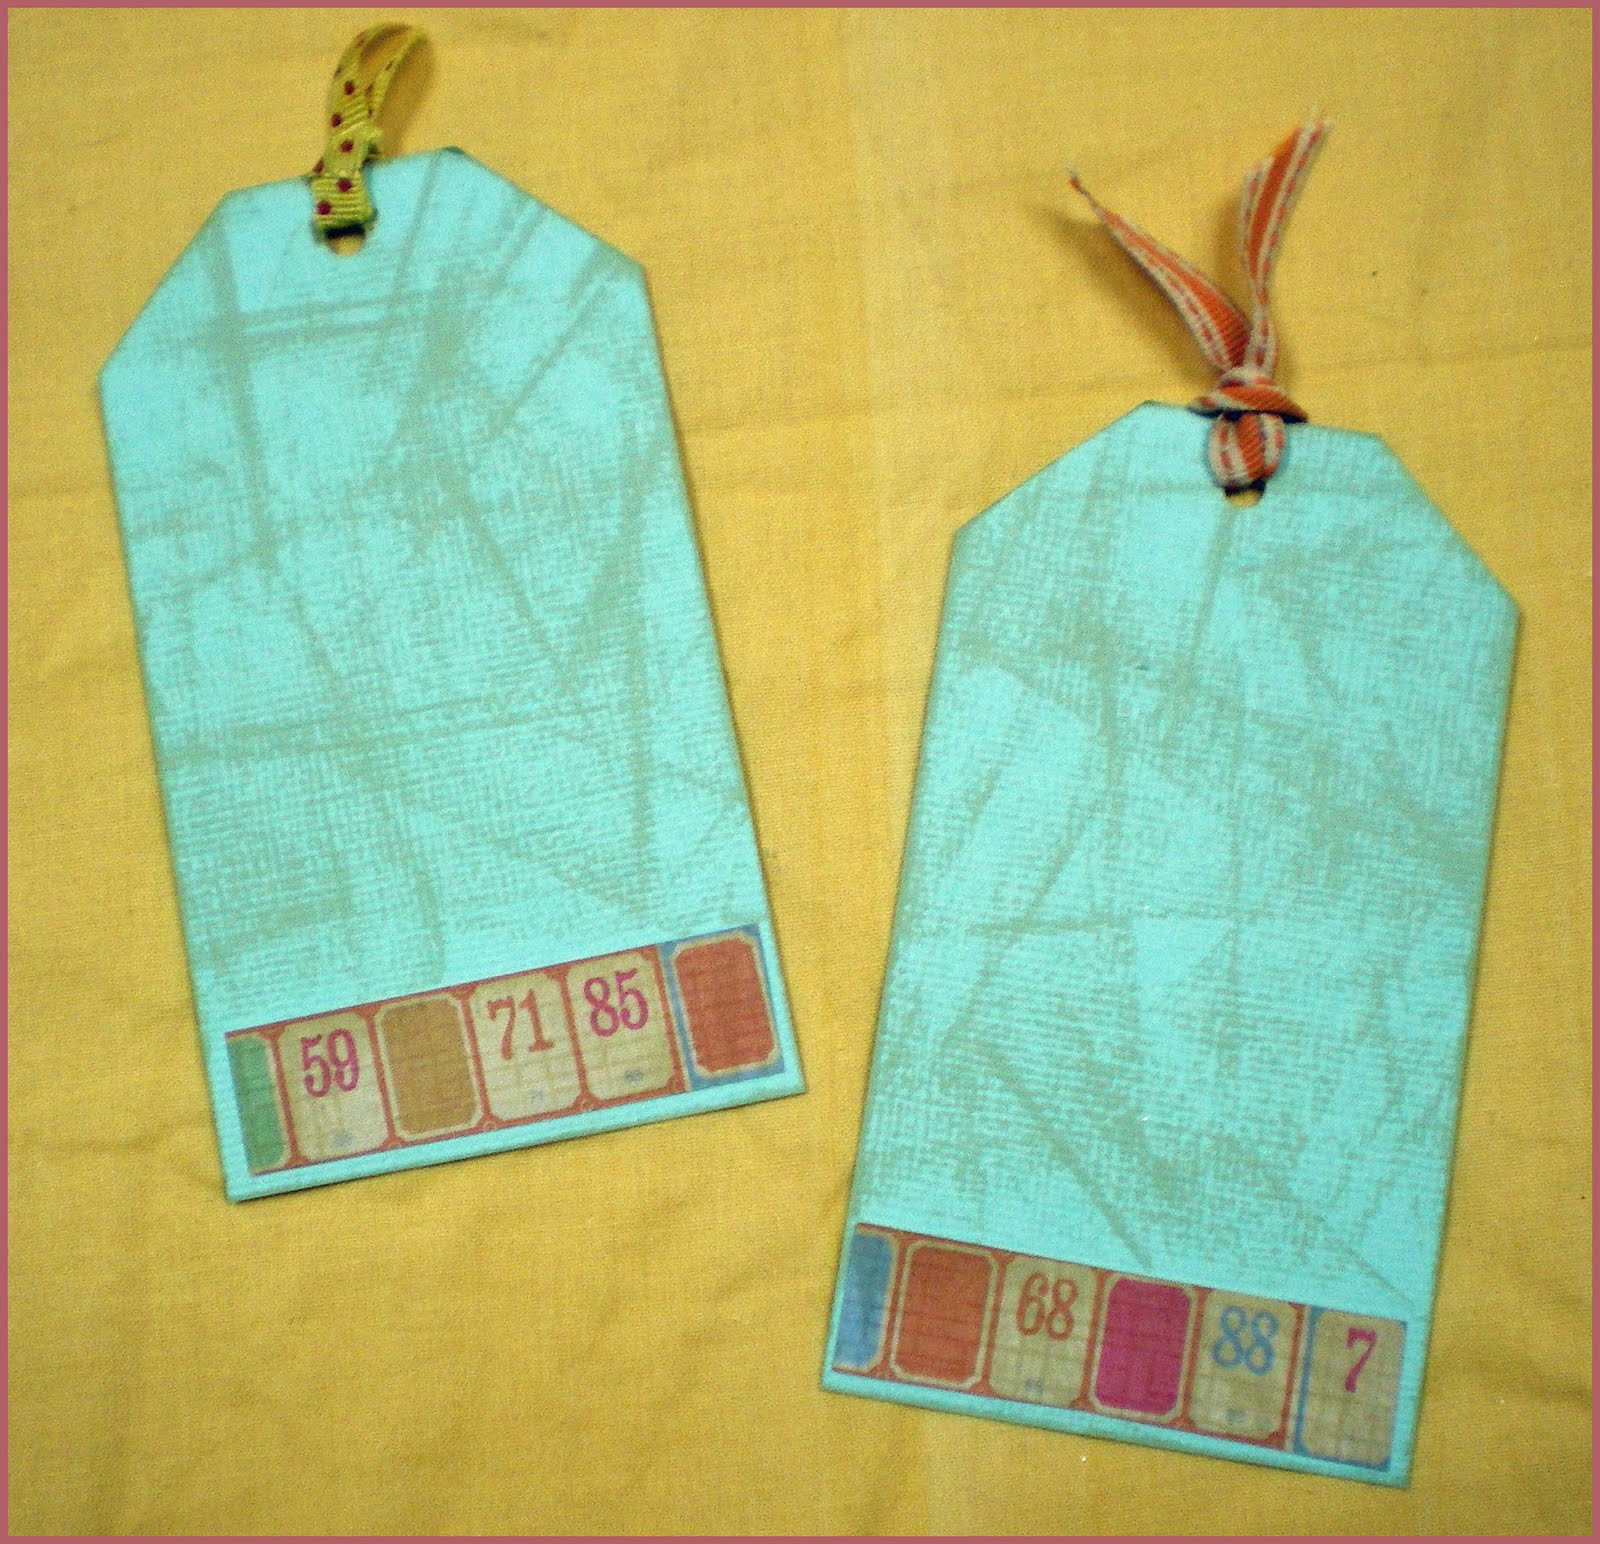
Cut two pieces of solid cardstock, 2 ½” x 4 ½”. Cut corners from one end to form tag shape. 
Distress with distressing ink.
Embellish with ½” strips of decorative paper. 
Punch hole at notched end and embellish with ribbon.


Accordion Album Step 16a Photo
Pocket Card Insert:
Cut the front of greeting card to 3”. Embellish with two 2 ½” squares of decorative paper, and a strip of decorativepaper in the middle.
Create pocket on inside of card. 
Cut decorative paper to 3”x5”. Apply adhesive to two short sides and bottom long side and adhere to inside of card to make pocket.
Cut a piece of decorative paper 3 ½” x 6”. Notch corners on one short side to make tag shape. Punch hole and embellish with ribbon.


Place all inserts in pouches and attach clips at top. Accordion fold shut and tie closed with ribbon. Enjoy!

August 8, 2011

Sunny Summer Decor

Sunflower and Lemonade Photo


Summertime, and the living is easy! Now is the time to enjoy the outdoors, and what better way than dining al fresco?


Summer Table Photo


Decorating with nature as your backdrop gives you so many of options. As summer reaches it's peak, sunflowers are a perfect choice to build your table decor around. Paired with blues taken from the sky and water, your tablescape will look fresh and cool during the summer heat.


Summer Place Setting Photo


While you're at it, why not think outside the box and use sunflowers in an unconventional way? Giant silk sunflowers, deconstructed, become unique placemats, while smaller blooms are the perfect backdrop for placecards.


Sunflower Hurricane Candle Photo/></a></div><div class=


Finish off your decor with a sunflower embellished candle in a hurricane to keep the wind out, and your dining adventure can carry on into the evening.


So, what are you waiting for? Grab some sunflowers, enhance your outdoor living space, and enjoy the lazy days of summer!


April 14, 2011

Pretty in Paisley Fabric Prints

The 1960’s were a tumultuous decade filled with change, expression and influence. Or so I hear. After all, I was born in the 90’s. Anyway, one huge aspect of pop culture that the 60’s influenced was, you guessed it, fashion. Long skirts, braids, sandals… They’re still chic, or at least they are this spring. And with that, I ask: what is more 1960’s than paisley?

Before I delve into some do-it-yourself links and tips, let’s have a history lesson. According to The Quilter’s Muse on paisley, the pattern style originated in the Middle East quite some time ago. The pattern later gained popularity in the 1960’s and the 1990’s. Look at that! Perhaps my nostalgic paisley preference makes sense now. History lesson: finished.


Now for some ideas regarding what to do with paisley fabrics (like my personal favorite paisley fabric print carried at our very own Beverly’s Fabric & Crafts stores). Spring cleaning is always a great idea, right? Sure. So! Follow Design*Sponge’s little DIY to make a playful paisley fabric storage bin. If your affinity is less organization-oriented and more fashion-prone, sew a precocious paisley bowtie (just in time for Easter) with help from papernstitchblog.com. As always, don’t forget to browse our online store for discount paisley fabric to help you in your DIY adventure.


After all of this, what do you think? Should paisley stay in the 60’s? Or are you glad that it comes back in style so often?


-Danielle

About The Author
Danielle is a current art undergraduate studying mixed mediums and textile arts. Her writing focuses on fashion and interior design in regards to the growing independent, handmade and D.I.Y. movements. We are happy to have her as a guest blogger on Beverly's Fabric & Crafts Official Blog.

tag: allstores

April 7, 2011

Embracing Springtime In Your Home Décor

Spring has officially arrived. As a season of newness, organization, and all things creative, spring is one of the best times to showcase your artistic talents. Where should you start? Your home is the number one place where your personality shines. If you’re hoping and wishing you could change the feel of your home, but don’t quite have the budget, start small. The moods of your accents and decorations change everything.

You say: “My living room is boring.” I say: “Throw pillows!” You might laugh, but it’s true. Plain-colored couches look fantastic and fun when paired with uniquely colored or patterned pillows, and it just so happens that Beverly’s Fabric & Crafts stores have a lovely selection of fabric for your home. I must admit, I’m pretty excited about the discounted Amy Butler fabrics because they remind me of spring! And that’s what we were discussing, correct? See what I did there? Anyway…

As I dole out tips, tricks, and advice to you in adding a little spice to your décor, I will also say this: the Internet is an awesome tool for inspiration. Not only can you shop for supplies online, but you can also see what others are creating and see what you like! Spring is a wonderful season because it gets people out of their creative hibernations. Also, people love to share their projects through blogs! When I need some creativity-caffeine, I visit blogs like I Go By Katie, How About Orange, and Oh, Hello Friend.

Who will inspire your spring project, and what will your project be? Share with us in the comments below or on Beverly’s Fabric & Crafts Facebook Page!

-Danielle

About The Author
Danielle is a current art undergraduate studying mixed mediums and textile arts. Her writing focuses on fashion and interior design in regards to the growing independent, handmade and D.I.Y. movements. We are happy to have her as a guest blogger on Beverly's Fabric & Crafts Official Blog.

tag: allstores

March 28, 2011

New BoBunny Paper Collections

Check out these two new paper collections from BoBunny now available at your local Beverly's Fabric & Crafts store!

The Gabrielle Paper Collection is welcoming and warm - helping you capture those every day moments perfectly...
Bo Bunny Gabrielle Paper Collection

Travel through the pages of Time with Bo Bunny's Timepiece Collection...
Bo Bunny Timepiece Collection


tag: allstores

March 23, 2011

Fabric Deal for March 23rd

Todays Deal of the Day fabrics are covered in daring, sharp edged floral arrangements that is sure to take your breath away. These cotton prints are perfect for elegant home decor projects and quilts. Every Deal of the Day special starts at 9pm (PST) and is marked down from original pricing to only $2.97! Our stock is extremely limited, so get these fantastic prints while you can! Visit us every day at Beverlys.com to see the next Deal of the Day!

Online purchases only!


9.99 2.97
BUY NOW
9.99 2.97
BUY NOW
9.99 2.97
BUY NOW

March 22, 2011

Fabric Deal for March 22nd

Todays Deal of the Day fabrics are a collection of adorable flannels that will not disappoint! A few cuddly prints filled with sunshine, rainbows, and cute little fairies, these prints are sure to fulfill all of your child quilt and nursery project needs. Every Deal of the Day special starts at 9pm (PST) and is marked down from original pricing to only $2.97! Our stock is extremely limited, so get these fantastic prints while you can! Visit us every day at Beverlys.com to see the next Deal of the Day!

Online purchases only!


10.99 2.97
BUY NOW
 
10.99 2.97
BUY NOW
10.99 2.97
BUY NOW